

Have you seen these nifty needle holders or "cozies"? After seeing a few pop up on various Instagram feeds and knitting podcasts, I decided to try to make one. Here's what I came up with for my 6-inch double-pointed needles. If your needles are longer or shorter, just add or subtract an inch from the length (8.5 x 4.5 for 7-inch needles, 9.5 x 4.5 for 8-inch needles, etc.)
FINISHED MEASUREMENTS: approximately 7 x 2 inches
MATERIALS:
2 pieces of fabric 7.5 x 4.5 inches: one lining and one exterior
2 sets of snaps (I use KAM snaps)
snap press
awl
optional: label & fabric interfacing of your choice
1/4 inch seam allowance

First, I interfaced my exterior piece, then, with right sides of both pieces facing, sewed one long side of my rectangle. Press open your seam or press to one side.

If attaching a label, now is the time to do that. I put mine on the lining piece.

Now, sew down the other long side of the rectangle with right sides facing. Next, line up the two seams and press.

Sew across one short side the entire length, backstitching when you start and stop. On the opposite side, only stitch down your exterior fabric, stopping just past the middle seam as indicated in the picture below. Be sure to backstitch here.

Use your iron and press in the side with the turning hole 1/4 inch. This will make your life easier in a few minutes.

Now, clip your corners and trim seams. Turn right side out through the opening and press.

Hand-stitch the side opening closed. You could use your machine here, but the hole is so small that it takes no time at all and looks much better this way.

It should look something like this when you're done:

Turn the lining inside and press.


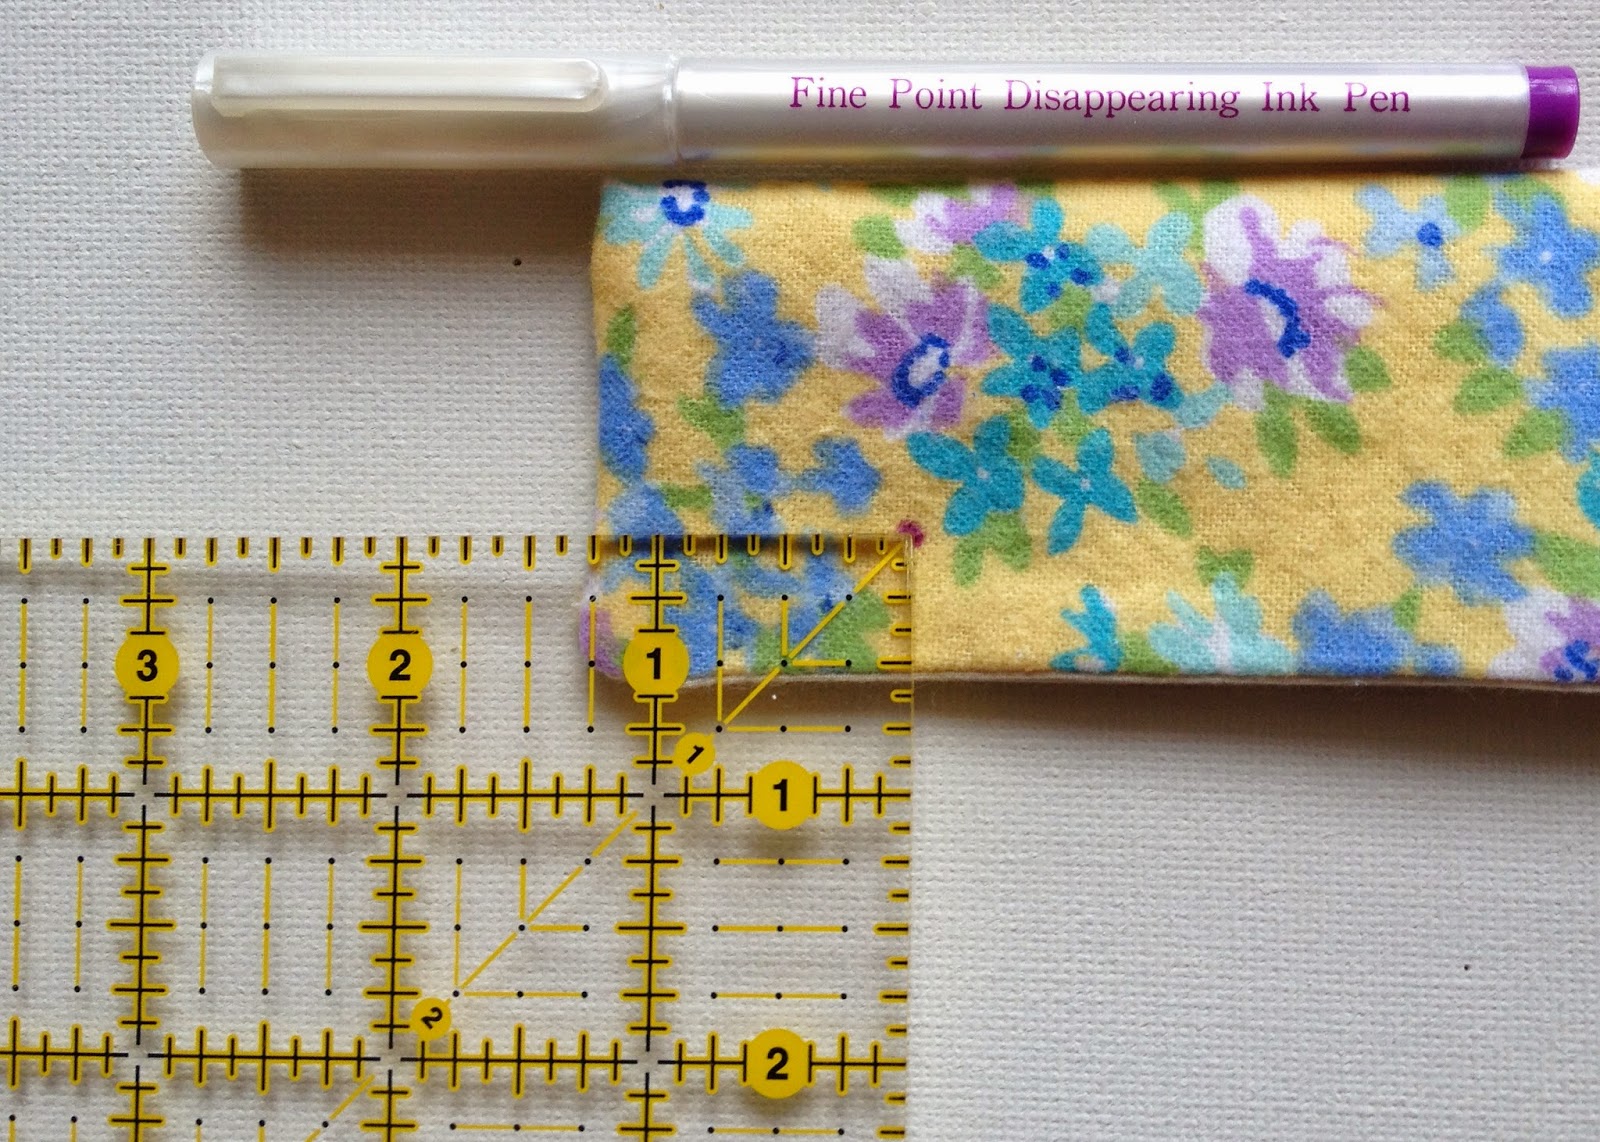
Use a pen to mark where the snaps will go. I used disappearing ink, but it really doesn't matter since it will be covered. I marked 1.25 inches in from the side, and 1/2 inch up from the bottom.
Use your awl to punch holes in the fabric where you marked.

Apply snaps with a snap press. I used size 20 KAM snaps with a KAM snap press. This is a pretty reputable brand, used by most cloth diaper makers. These are easy to find on Amazon and Etsy in all the colors of the rainbow. You can also find similar snaps at most big box craft stores, though the selection is much smaller.

Insert your work-in-progress and enjoy keeping your work nice and tidy!

If you use this tutorial, please tag me on Instagram (@thenomeknitter) or use the hashtag #thenomeknitter
I'd love to see what you make!
Edited 4/13/16 to add:
Since I posted this tutorial, I have made literally hundreds of these little DPN holders. One tip I have is to cut the lining fabric 1/4 inch shorter than the exterior fabric. Your lining piece would be 7.5 x 4.25 for 6-inch needles. This helps the lining snug up inside a little better. I also recommend applying interfacing to both pieces, my favorite is Pellon SF101. Happy sewing and knitting!
Love it!
ReplyDeleteThank you!
DeleteI was just looking for a tutorial for this yesterday so thank you!
ReplyDeleteI'm glad you found it helpful!
DeleteWhere did you get your adorable labels?
ReplyDeleteThese labels are some I made using Spoonflower. You can upload your design and order an 8 x 8 inch swatch, fat quarter, or yard of fabric. Then just cut and sew! The only downside with these is that they do tend to ravel very easily, so you either have to sew a zig zag around them or fold under the edges. Another great resource for labels is Etsy.
DeleteCool! Thanks. :)
ReplyDeleteThis is so helpful. I love supporting other crafters, but I always look at something and my first thought is I can make that! I already have everything so why not!
ReplyDeleteHi first of all, thank you for your pattern. I made a holder, however I'm missing a step somewhere. The part where the 2 sides are sewn closed together just before adding the snaps. My holder, I sewed to the part, which once turned inside out, was sewn by hand. When or how did the sides get sewn together? Could you please tell me what step that is? Thank you
ReplyDeleteFrancine
Hi Francine,
DeleteAfter you sew both long seams together, you line these up so that the lining fabric is on one side, and the exterior fabric is on the other side. Then sew all the way across one short side and halfway across the other short side, leaving a small hole for turning inside out. Hope that helps!
hello Joanna
DeleteI just noticed your reply to me lol. I finally figured it all out. Thank for for your share. Now I have to figure out how to do one way design. My trees, in this instance come out upside down. Someone told me to cut the main fabric in half then sew opposite ends together. Back to the drawing board.
Francine
I just saw this item on a knitting podcast and started looking for one. But, I must prefer to make my own so thank you for the tutorial.
ReplyDeleteYou are very welcome. :)
DeleteThank you! I love when a quick Google search brings me where I need to be. I make my own bags and will love having some matchy-matchy needle cozies!
ReplyDeleteI'm so glad you could use the tutorial!
Deleteoh, how nice. Thank you :)
ReplyDeleteYou're welcome! :)
DeleteThank you! Made one in an hour :).
ReplyDeleteOff topic, what yarn are you using for the sock pictured in the tutorial?
That's great, you are very welcome!
DeleteThe sock yarn pictured is from the Opal Sweet & Spicy line in the Ice Cream color way. :)
I just purchased one of your double-point needles holders this past weekend at a yarn shop in Cary,NC I love it! I went on line to see how to make one, what joy to find your tutorial. Very generous of you to share. Thank you.....
ReplyDeleteThanks, Cathy, for the comment! So glad you can use the tutorial and you are very welcome!
DeleteThank you so much for sharing!!!
ReplyDeleteYou are very welcome!
DeleteI bought my snaps kit, but I'm having a hard time squeezing them to stay on. Made a few of these needle cozies, but on one of them 1 part of it keeps coming off. On my other cozies, the snaps are very hard to close shut. Any help would be greatly appreciated. Thank you
ReplyDeleteHi Francine,
DeleteI'm not sure what the problem is exactly without being able to see it. Did you buy a KAM snaps set? If so, there may be some tutorials on YouTube that show the correct way to install. The only thing I can think of is that sometimes the fabric is a little too thick for the snaps, in which case they do sell snaps with a longer prong. If the plastic snaps are still giving you trouble, you could always use an alternative like the sew-on metal ones used for clothing.
Hope that help!
Joanna
Francine, I'm sure you have figured out your problem already (and you probably don't have the same problem as I, since you mention a snaps kit, also, we live in a different continent entirely!).
DeleteAnyway, I noticed that I had a problem when I used Prym Color Snaps with KAM pliers. I read that they should be compatible but apparently they were not. The caps would separate from the studs/sockets. I noticed that the prong wasn't squeezed down enough. Using Prym pliers with Prym snaps they stay put, but are hard to close. I'm glad I also ordered a KAM snap set with pliers, since I don't have any problems with those!
I did two of these keepers/cozies today. They work well for both the DPNs and circular needles I have. Though I think I used too thick interfacing so the seams are bulky and it was quite difficult to turn the fabric from the small hole. So there's room for personal improvement when I make these again! :) I'm not quite sure how to do the "trim the seams" part exactly?
Thank you for the tutorial, Joanna!
Hi Joanna, thank you for the wonderful tutorial.
ReplyDeleteHave you got any tips regarding seam bulk? How do you trim your seams? Do you clip corners? And do you get a better result if seams are towards lining or exterior fabric?
Thank you
Thank you so much for your great direction!!!
ReplyDeleteI'm using Kam snaps and Kam tool. I read somewhere there are different snaps. Some for thicker and some for thinner fabrics. So I'll have to look into that.
ReplyDeleteThis is perfect! Just what I was looking for. Thank you for the great tutorial.
ReplyDeleteThis is a great tutorial - thank you so much for this. X
ReplyDeleteI love it but can you use it for circulars as well?
ReplyDeleteThis comment has been removed by the author.
DeleteWithout a pattern, I cut my material and started sewing...then it didn't look quite right. A quick search for this tutorial on Pinterest and I found my mistake. Thank you for the tip to press the unsewn seam before turning. I've never done this before and it was sooo helpful. I'm giving mine as a gift to an Instagram friend.
ReplyDeleteHow much bigger would u make the fabric for 8" DPN? Would it be 9.5"?
ReplyDelete