

Supplies you'll need:
- 2 yards of fabric - mine is from Hobby Lobby
- paper bag or paper for making pattern
- scissors or rotary cutter and mat
- ruler
- fusible interfacing
- sewing machine
- thread
- pen or chalk for tracing
- premium poly-fil or filler of your choice
First, you need to figure out how big you want your pillow to be. Think of it as a cylinder, with a circle at the top and bottom. Figure out what you want the diameter of your circle to be and how tall you want your pillow to be. My diameter was 18 inches and my height was 14 inches. Mine is more ottoman-sized. If I were going to make this as a pillow, I would probably make the height about 7 or 8 inches.

I used a paper grocery bag to make my pattern. You could also use freezer paper. It is basically a rectangle with a triangle at each end. This is basic geometry. First, figure out the dimensions of the triangle:
The height of your triangle should be half the diameter (the radius) of your pillow. Mine was 9 inches. Then, to figure out the base of your triangle, use this basic equation for circumference:
radius x 2 x pi
So: 9 x 2 x pi = 56.55 (you can round up to the closest 1/4 inch)
Divide the circumference by 8 (the number of panels in the pillow) : 56.55/8 = 7 (approx)
The base of my triangle was 7 inches.

Draw a straight line for the base, find the center, then draw a perpendicular line from the center point for the height (remember the height of the triangle is the radius of the top of your pillow.) Connect the ends of the lines on either side and you have a triangle.
Then make the pattern as long as you want the height of your pillow, then draw another triangle. Cut out your pattern, and you can begin.
Let's talk about seam allowance for a minute. Don't be like me and completely forget about it until after you cut out your pieces. Add about 1/4 to 1/2 inch to each side of your pattern for seam allowance. Or, you can cut your pattern out to the finished dimensions, trace around it on your fabric and cut it out a 1/2 inch outside the line. Then you could sew directly on the line you traced. I'm thinking that would be the easiest thing to do.

I used a rotary cutter and mat, but scissors will work just fine. I folded my fabric in half so I could cut out two pieces at a time. I also staggered my pattern to use less fabric.

Cut out eight pattern pieces.

I pressed mine so they were easier to sew.

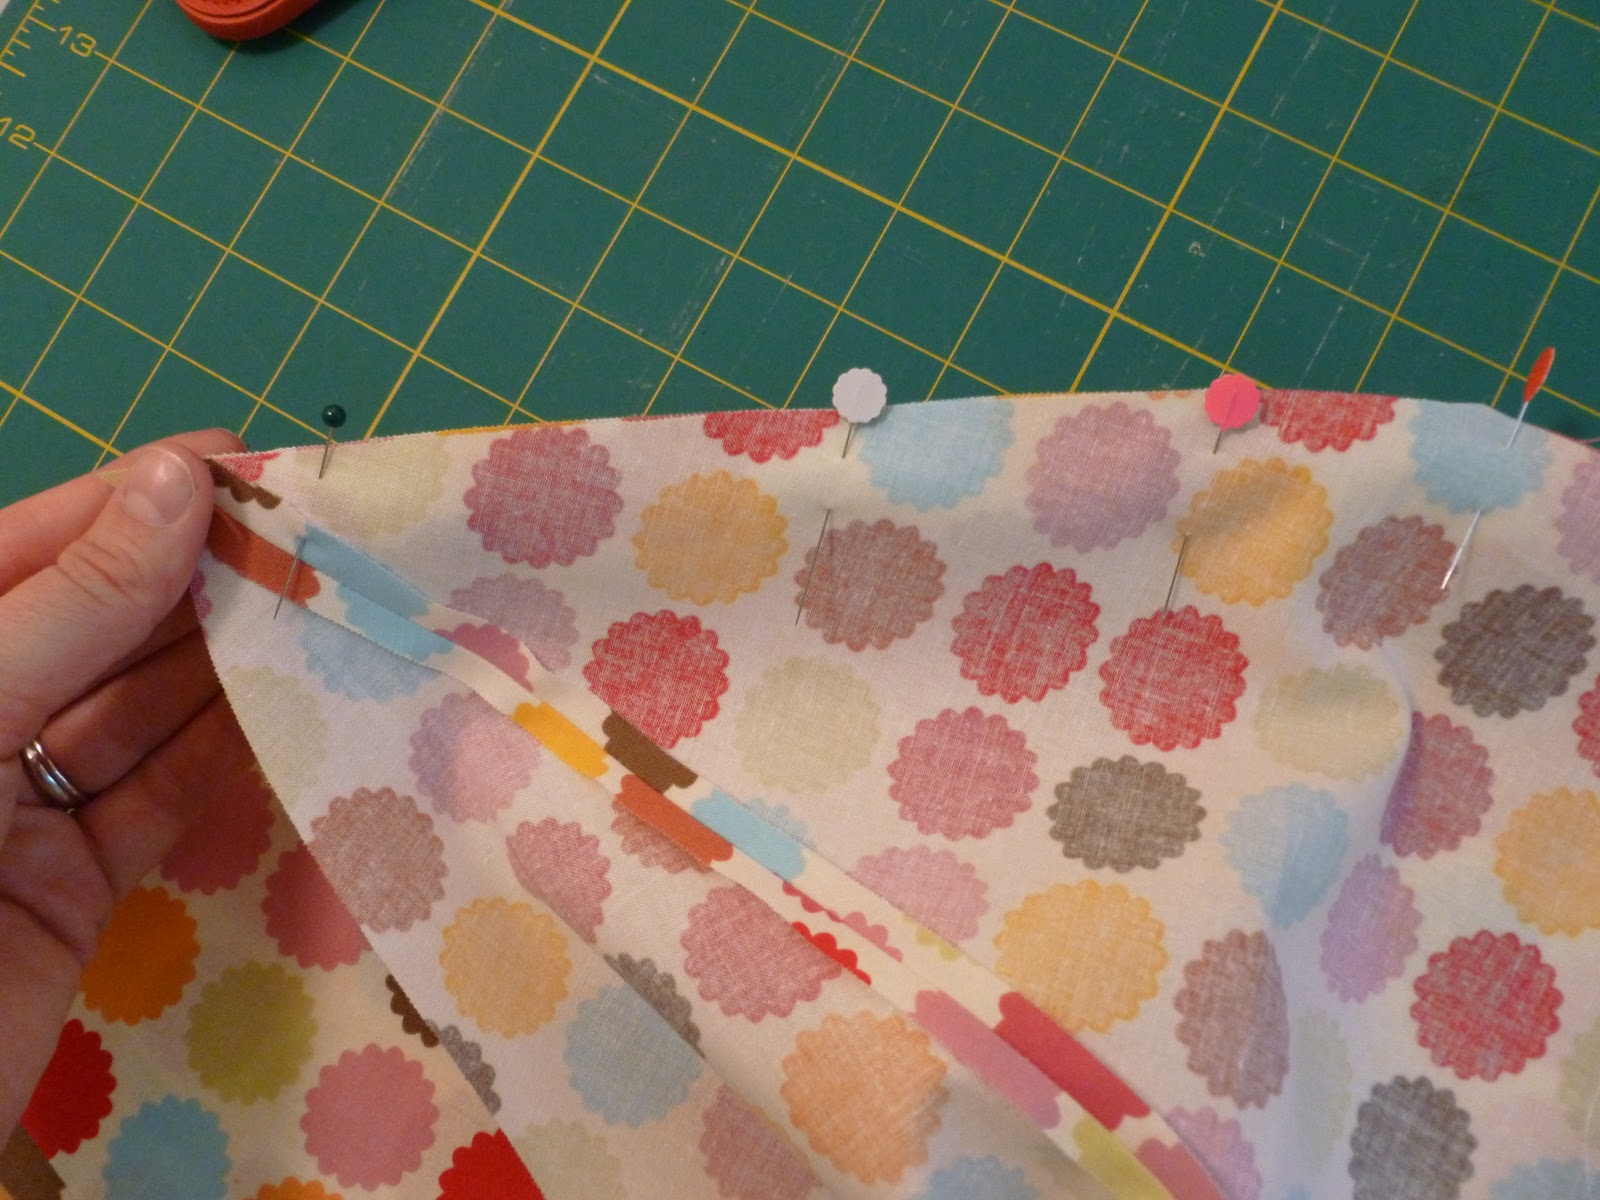
Starting at the point of the triangle, sew two pieces together, right sides facing, using the seam allowance you figured into your pattern. Since I forgot to figure it, I just used a 1/4 seam. Go with the flow, my friend.

When you get to the point where the triangle meets the rectangle, stop sewing, needle down, pivot, and continue sewing a straight line. I placed pins at each corner to remind me.


When you get to the end and your ends don't match up, don't worry. You'll cover this up later.

Press open your seams.

Since it's a weird shape, I draped it over the corner of the ironing board to help it lay flat while I ironed.

Clip the corners to reduce bulk.
Pins are your friend.

It's starting to look like an inside-out beach ball.

Keep going, sewing all the panels together.

Last one!

Pressed seams.

On your last panel, leave about a 3-4 inch opening for turning and stuffing.

My opening was more like 2 inches, so it was really hard to turn. Looks like a jellyfish!

Now find something to trace to make your pieces to cover the top and bottom. I found a mug with this shape, but a circle will do just fine. Make it as big or small as you like. This was just shy of 4 inches.

Now you'll need some fusible interfacing, fabric, scissors, and something to trace with.

Trace your pattern to the fusible side of the interfacing.

Pin the right side of the fabric to the non-fusible side of the interfacing. Stitch directly onto the line you just traced.

Cut out pieces 1/4 inch outside the stitched line. Trim the corners.
 Make a slit in the interfacing and turn right side out through the hole.
I used a knitting needle to push out the points. I also pushed a bit too hard on one, as you can see. No biggie, just use a straight pin to push it back in and a drop of liquid fray check. Give them a good press.

Hand stitch on the end without an opening. Use an invisible stitch. Mine is not so invisible, but I'm not too worried about it.

Now stuff your pillow! I used every last plastic bag we had in the house, a ton of organza left over from decorating my wedding, and this bag of poly-fil. If you want to just use poly-fil, count on using about 10 bags or more. If you're making an ottoman, you want it to be very firm. Even if it looks full, keep on stuffing! I sat on mine every few inches to make sure.

Now, sew up this ugly hole. This was the most challenging part. Mine did not look great, mainly because I was rushing to get it done and all the stuffing made it hard to sew. I just decided to make it the bottom of my ottoman.

Hand-stitch the other end piece.

You are done!
LOVE it! I want to follow you. How do I do it? Momma
ReplyDeleteI added a place to enter your email on the sidebar. :)
ReplyDeleteThank you for an awesome tutorial! I have been looking for ottomans to put out on the my screen porch that don't cost a fortune, unable to find any that are pretty AND affordable Sooo glad because I found your web site instead. I will make these using outdoor fabrics. Thank You!
ReplyDeleteThis comment has been removed by a blog administrator.
ReplyDeleteVery nice.. Thinking of making it later.. Wish me luck k.. 😀
ReplyDelete