Showing posts with label Wool. Show all posts

Monday, November 3, 2014

Finished Object: Eole for Girls Cardigan

Earlier this summer, we visited Guthrie, Ok and made a stop at the local yarn shop, Sealed With a Kiss.


They were having a sale.


This tub was filled with knitted samples, all discounted. Some gorgeous stuff in there. Can I climb in?


The bench outside the shop.


I got to browse the shop while he kept the little one occupied.


I found some discontinued yarn that was 70% off, so I bought a toddler's sweater's worth, and a sweater's worth for me. It's 100% wool, 8ply, DK weight. This should be a hard-wearing wool that won't pill easily. The only downside of buying a discontinued yarn is that if I run out, it will be really hard to find more. I bought all the remaining Lilac and Grey balls that they had left.


Four months later, I cast on the Eole for Girls cardigan.


It has the cleverest design; I love the unique increases on the sleeves, with its windmill pattern.


The sweater is finished with an I-cord bind-off around the entire edging. It took some fiddling with a lot of different needles, but I managed it.


Here it is finished and blocking.


And on my happy little model.


Wednesday, October 29, 2014

Dyeing Yarn with Food Color and Kool-Aid

Hello, all.

I've been doing a bit more spinning lately, and so I've been stalking some Etsy shops for their hand-painted wool tops. Some of the color ways are so gorgeous, if I had an unlimited cash supply, I would be lost somewhere under a huge pile of wool.

By far, one of the best shops I found is SpunRightRound. Her colors are amazing. I love the sock yarn she has in the colorway called, "Graffiti."

I had to wonder if I could create something similar myself. The results: I did not even come close to the yarn I was coveting, but this is what I did create with some Lion Brand yarn and food coloring:


Although my finished product looked nothing like what I hoped, it didn't turn out too bad. Here is what I did:

I started out with this Lion's Brand Fishermen's Wool. 


I wound about 1/4 of it onto my homemade niddy noddy. Here is a tutorial to make your own. It cost less than $5 to make. 


Picked up some McCormick Assorted food coloring in standard primary colors + green.


Since I used food-safe dye, I simply used a large cooking skillet we have. I filled the skillet with enough lukewarm water to barely cover the yarn, then soaked the yarn thoroughly. 


Some other supplies I used: plastic wrap to protect the countertops, glass jars for mixing and I also decided to use this Grape Kool-Aid on another skein of wool.


Once the wool was soaked, I turned the heat onto medium high.


I used a tablespoon of water per glass jar, and started mixing some of the primaries together in an attempt to create pink, purple and turquoise. Just a few drops of color in each. 


As the wool heated up, I started dropping in the food coloring, starting with yellow. Don't ask me why, it seemed like a good idea at the time.


I then layered other colors, only dropping in a a drop or two at a time. As the water heated, the colors began to run.


I used this medicine dropper for the dyes I pre-mixed, rinsing it between colors. 


I think I should've waited until the pot was simmering to add dye. Maybe the dye would've set faster, creating less mixing of colors.


Probably less water next time too, so the dyes can't run so easily. Water is simmering here, not boiling. 


This was the Grape Kool-Aid pot. I stirred in the Kool-Aid first and added the wool dry, so it would soak up the dye unevenly.


Almost forgot, I added white vinegar to both pots in order to set the dye. I let the yarn simmer for about 30 minutes, then let it cool down before removing from the dye pot. Here it is rinsing in the kitchen sink. 


I hung it up to dry overnight, hanging over the washer to catch any drippings.


And here are the finished products.


You can see here where the purple dye separated a bit into a light blue.


I'll probably use it to knit up a bag then felt it. What do you think?

Wednesday, July 2, 2014

Fraternal Socks

This week I finished my pair of How I Make My Socks by Susan B. Anderson. Most of the knitting was done while the little one napped.


If you look closely, you can tell that the gussets on each sock are slightly different. I suppose this is because I had put them away for so long, and when I picked them back up, I didn't bother checking the pattern.


I followed the toe decrease directions for the gusset, so it ended up being about half as long as the gusset on the first sock. Can you tell the difference?


It didn't seem to affect the fit at all, in fact, I kind of liked the fit of the "mistake sock" as it seemed a bit more snug around the ankle.

Celestial Colors colorway

What do you think? Have you ever made a "mistake," only to be pleasantly surprised by the results?

Let me know in the comments below.

Happy knitting!

Thursday, August 22, 2013

Up-cycled Wool Diaper Cover Tutorial


I'd like to share with you how I made this wool diaper cover from an old sweater and without using a pattern. Some things you'll need:

1. 100% wool sweater 
2. sewing machine
3. scissors or rotary cutter and board
4. ruler
5. brains
6. cute baby

First thing you want to do is take your baby's measurements at the waist, thigh and rise (from belly button down between their legs to the point opposite the belly button on their back.) I took these measurements over the cloth diaper and cover she was wearing. You definitely want to factor in the bulk that you'll be covering.

My baby is eight months old and about 20 lbs. These were her measurements:

Waist: approx. 18 inches 
Thigh: approx. 11 inches
Rise: approx 15 inches


First, find an old, 100% wool sweater. This was in my closet, but thrift stores are a great place to look. If you find a sweater that's accidentally been thrown in a washer and dryer, even better. 


Next, you need to figure out how far from the bottom of the diaper to cut. If you want the finished rise of your cover to be 18 inches, cut 9.5 inches off the bottom of the sweater. Simply divide the rise in half and add .25 to .5 inches for a seam allowance. 


You should now have a tube.

The great thing about using an old sweater is that a lot of the finishing is already done for you. See the ribbed band that was the bottom of the sweater? We're going to use this as our waist band. We're also going to take advantage of the side seams as well. 

You want to cut a piece that equals half of your baby's waist measurement. Remember that knit material is pretty stretchy, so it's okay to cut it a little less than half. 

I actually cut my piece right in half because I got two pieces each about 7 inches wide, and now I'll be able to make two covers from one sweater. 


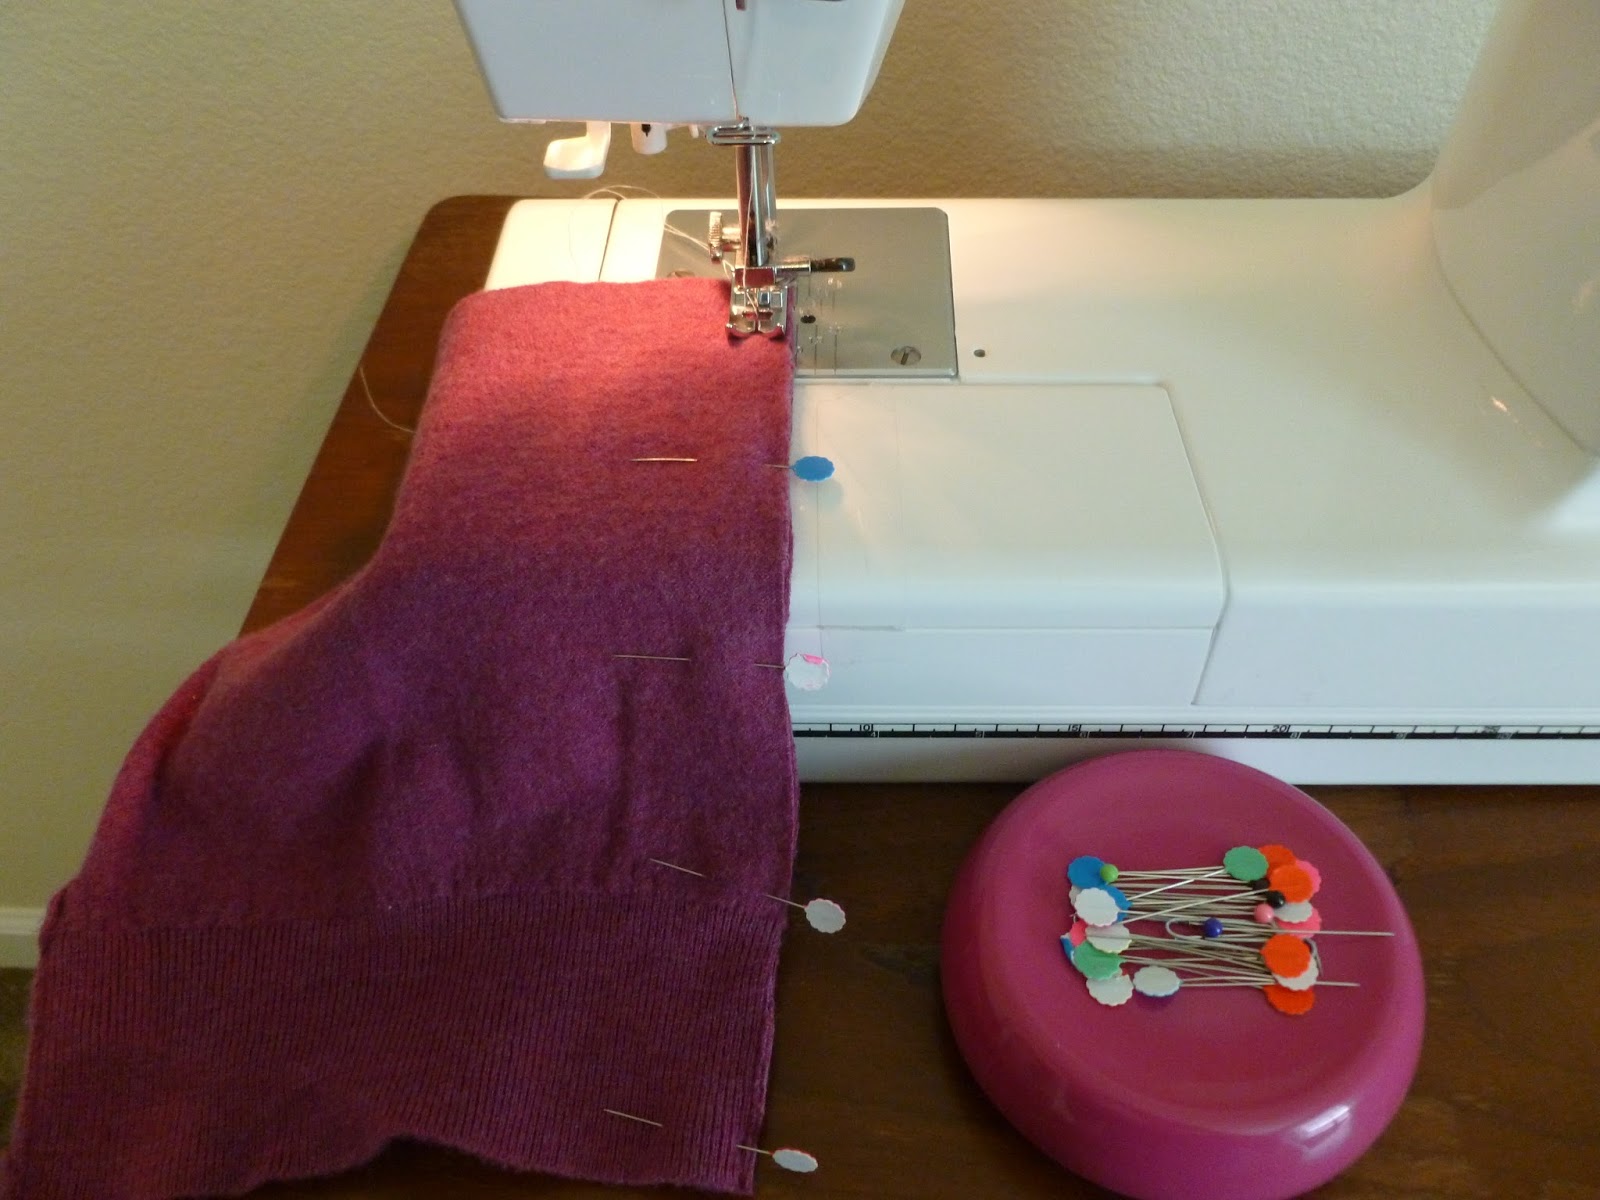
Next I turned it right sides facing, and sewed a straight line down the cut side with a quarter-inch seam allowance.

 (Edited 3/1/15: I sewed this cover using a straight stitch, which ended up working just fine. However,   as this is a knit material, it is ideal to use the elastic stitch setting if your machine has one. A serger would be the best option, but I don't have one just yet. If you do use a straight stitch, realize that it will have no give and the stitches will be prone to tear if you try to stretch the fabric much after sewing. I was still able to use my cover just fine, but I did eventually have to repair a hole after the stitching broke in one place.)


Now it looks like a tiny skirt.


One more measurement to take: the width of baby's diapered crotch. Mine was four inches and I marked this on the bottom with chalk. You should also add seam allowance to this; I forgot, but it didn't make too much of a difference. 


Next, I used half the thigh measurement to determine the length of the leg opening. You can use a string or flexible tape measure to lay on your fabric to make sure your line is the correct length. I just freehanded it.


Fold the piece in half and trace the line with a rotary cutter.


Sew the crotch shut.


Next, cut off both sleeves at the seam. 


Trim the top.


Now, if you can, find a place on the sleeve that matches half your thigh measurement. Cut out a piece about 4 inches wide. 


Take the tube you just cut and fold it so the wrong sides are together. 


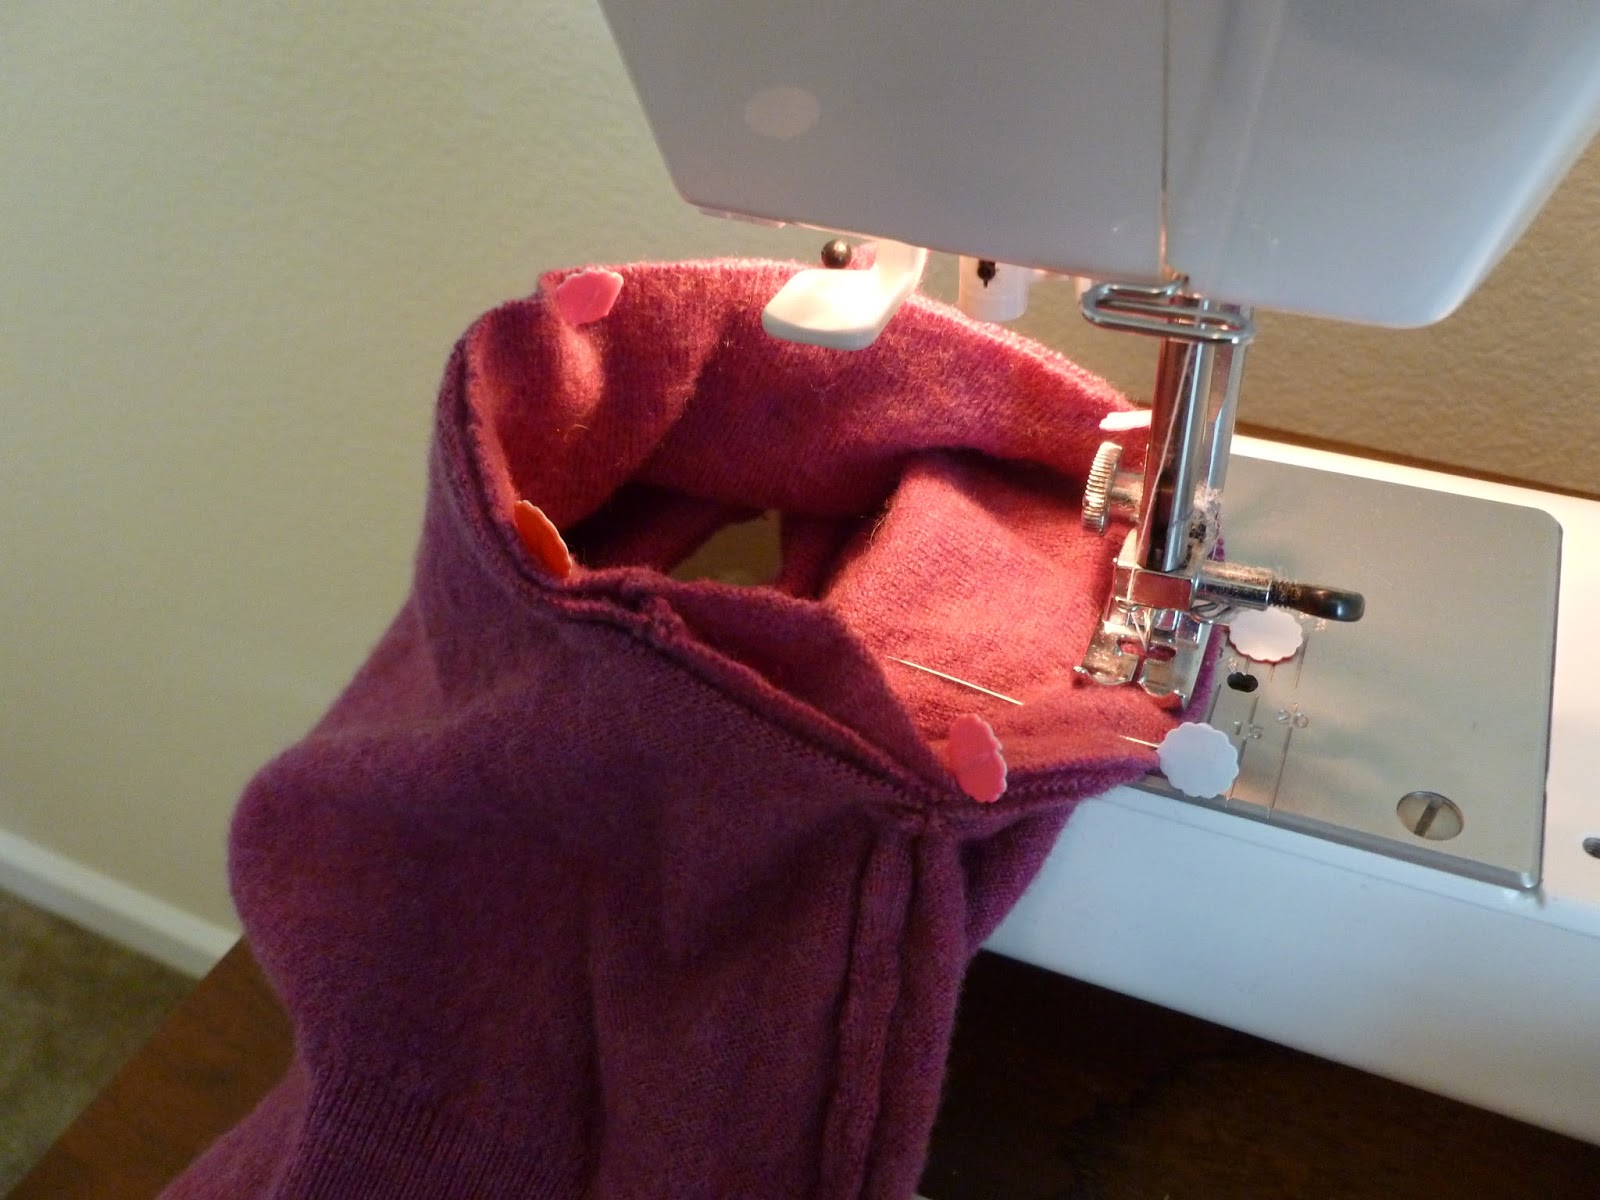
 Pin to the outside of your  leg opening and sew. 


Or you can turn the soaker inside out and pin to the inside and sew. I actually found this way to be easier.


All this cover needs is to be lanolized, and you are done! 

Some actions shots:


I love how thin and comfy the waist band is. She's wearing this over a flat diaper secured with a Snappi. 


A bit of her diaper is poking out the top of the back, but since this hardly ever gets wet, I'm not worried about it.